Hello there, aspiring web designers and developers! Today, we're diving into the enchanting world of CSS Selectors, the secret sauce behind the stunning styles you see on websites. CSS Selectors might sound intimidating but fear not, we'll break it down into easy-to-understand bits!
What are CSS Selectors?
Imagine a treasure map for your web page elements - that's exactly what CSS Selectors are! They are special patterns that help us find and style specific HTML elements. Think of them as wizards waving their wands to sprinkle colors, fonts, and layouts all over your website.

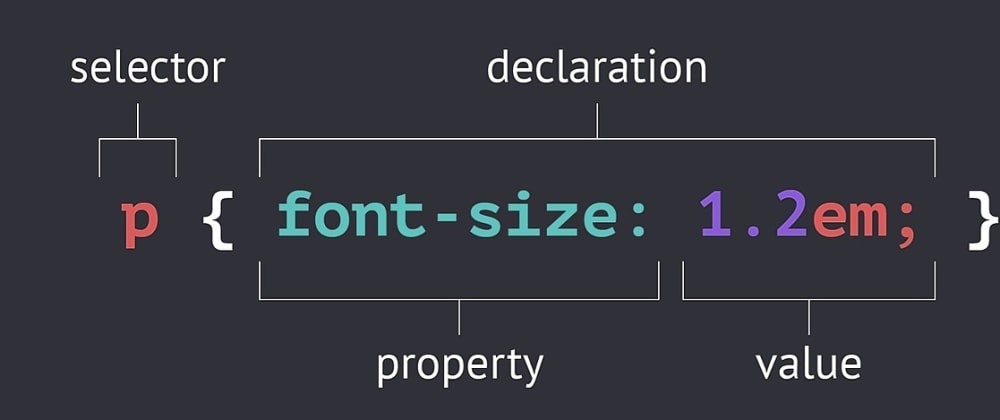
Selector: The selector is the part of the CSS rule that identifies which HTML elements the styles should be applied to. It can be based on the element type, class, ID, attributes, or even relationships between elements.
Declaration block: The declaration block is enclosed in curly braces {} and contains one or more style declarations. Each style declaration consists of a property and a value. The property defines what aspect of the element you want to style (e.g., color, font-size, margin), and the value specifies the actual styling for that property.

The Simplest Selector: The Element Selector
The Element Selector is a friendly magician who can style any HTML element on your page. For instance, if you want to style all your headings, you can use the h1, h2, h3, and so on as your CSS selector.
/* Styling all headings */
h1, h2, h3 {
  font-family: 'Arial', sans-serif;
  color: #333;
}
Before Styling :

After Styling:

Making It More Specific: The Class Selector
The Class Selector is like a special tag for specific elements. It allows you to style a group of elements that share the same class attribute. To use it, add a dot (.) before the class name.
<p class="highlight">This text will stand out!</p>
<p>This text won't be styled with the class.</p>
/* Styling the elements with the class "highlight" */
.highlight {
  background-color: yellow;
  font-weight: bold;
}
Before Styling :

After Styling:

Being Unique: The ID Selector
The ID Selector is the sorcerer's apprentice - unique and powerful. You can only use an ID once on a page, and it helps style a specific element. To use it, add a hash (#) before the ID name.
<div id="header">This is my header!</div>
/* Styling the element with the ID "header" */
#header {
  background-color: #f2f2f2;
}
Before Styling :

After Styling :

Combining Powers: The Descendant Selector
The Descendant Selector allows you to select elements that are nested inside other elements. For example, you can style all the p elements inside a div with this selector.
<div>
  <p>First paragraph</p>
  <p>Second paragraph</p>
</div>
/* Styling the "p" elements inside the "div" */
div p {
  font-style: italic;
}
Before Styling :

After Styling :

Hunting Elements: The Child Selector
The Child Selector is quite picky; it selects only direct children of an element. Use the greater-than sign (>) to wield this power.
<ul>
  <li>List item 1</li>
  <li>List item 2</li>
</ul>
/* Styling only the "li" elements that are direct children of "ul" */
ul > li {
  list-style-type: circle;
}
Before Styling :

After Styling :

Congratulations! 🥳 You've now learned the basics of CSS Selectors.

Armed with this knowledge, you can work wonders with your website's appearance. Remember, CSS Selectors are your allies in the realm of web design, and the more you practice, the more magical your web pages will become. So, go forth and create enchanting web experiences! Happy coding! 🌟
